
Guide: Choosing a video recorder

LCD or DLP?
Video projectors nowadays mainly use two different technologies to produce the image: LCD or 3LCD (Liquid Crystal Panel) technology based on a liquid crystal panel, and DLP (Digital Light Processing) or micro-mirror technology. And there are even different variations and levels of development among them. For example, the D-ILA developed by JVC and the SXRD by Sony.
Due to the scope of the topic, we will now only briefly discuss LCD and DLP technologies. However, it should be noted that both technologies have their advantages, although there are also different opinions about them: the advantages of LCD are said to be cleaner and, above all, brighter color reproduction, image brightness, sharper image (with reservations on the same resolution), and quieter operation. On the other hand, they feature a more clearly visible pixel grid and weaker contrast especially in large image areas.

In LCD projectors, the light is routed through a red, green, and blue liquid crystal panel. The numerous small ports (2,073,600 in full hd panels) on the liquid crystal panel allow the light to pass through at different intensities, forming the image from these pixels onto the lens, which is projected onto the screen through a magnifying lens.

In DLP projectors, the image is formed using a micro-mirror panel and a so-called color wheel. The color wheel is synchronized with the panel so that red, green, and blue light is reflected onto it at a fast rate. A total of 2,073,600 tiny mirrors reflect the corresponding part of the image in turn, and the image is then projected through a magnifying lens onto the screen. The viewer does not notice the differences in the colors; they perceive the image as a normal color image.

The BenQ W2000 Full HD DLP projector is one of the best-selling models in Finland in its class and has performed well in tests. The W2000 has a so-called Rec.709 color format, which means a pre-calibrated image, so the projector should be ready to use straight out of the box. The projector also has lens shift, which allows for versatile placement. Price range under 1,000 euros.

The Epson TW5600 is a high-quality 3LCD basic projector that is promised to produce images of up to 300 inches (width 762 centimeters). It also features lens shift, trapiche correction, and 1.6x manual zoom, 3D capability, a long-lasting bulb, and an affordable bulb price. The TW5650 model also has wireless networking and Miracast support for phones. Recommended prices are €899 and €999.

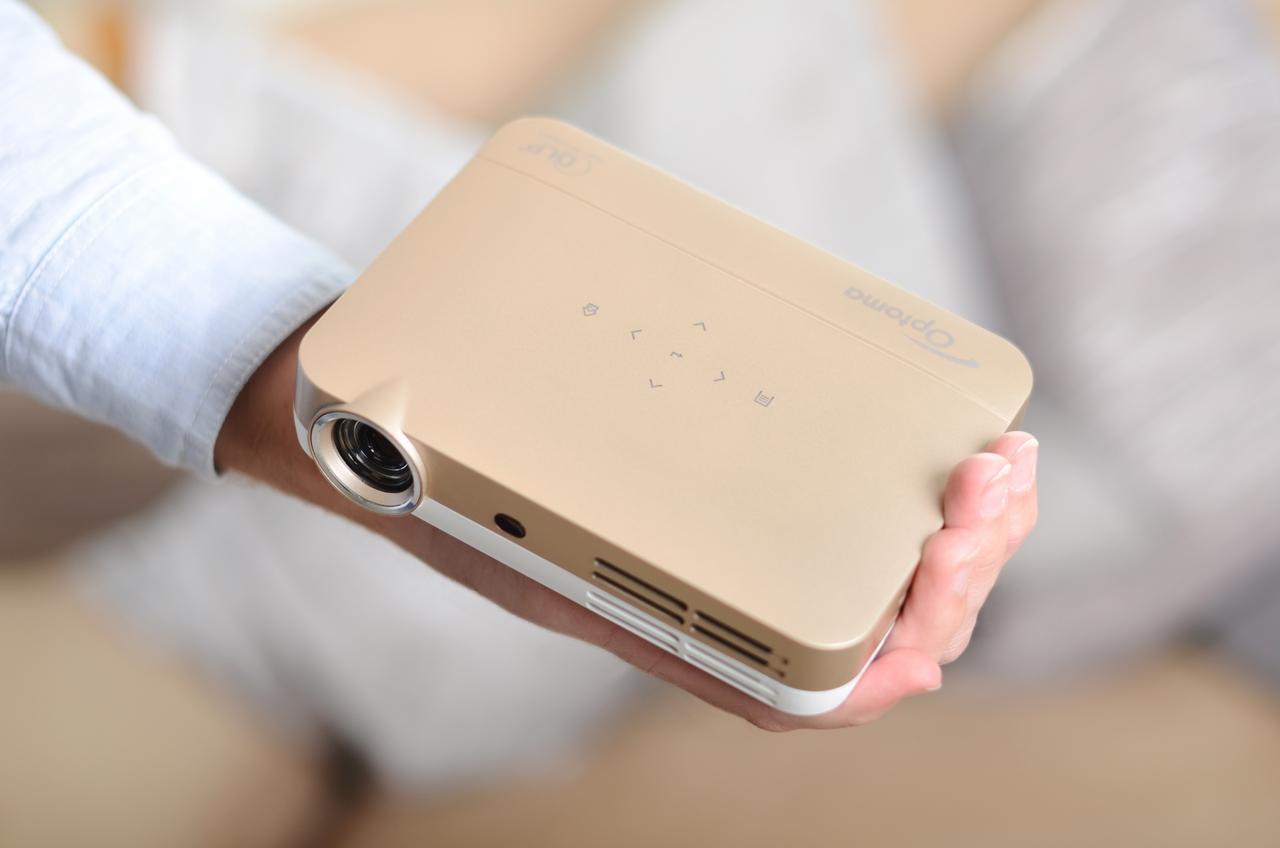
Optoma GT1080Darbee is a compact and yet versatile full hd 3d dlp short throw projector. Its high brightness, short throw distance and low response time make it especially suitable for gaming. The projector’s response time is only reported to be 16 milliseconds. The manufacturer promises that the vivid image will also be alive in movie use. From a throw distance of one meter, a projection of up to two meters (about 92 inches) is promised. Price range 1,000 euros.
The advantages of DLP are good contrast and therefore very good black reproduction, the absence of pixel networks even in large image sizes, and the smoothness of the image. The disadvantages are some very rare, sometimes annoying, so-called rainbow effect (in certain situations, the colors appear to rain in a rainbow-like manner) and, with reservations, a lack of brightness and clarity in the reproduction of colors compared to LCD technology. On the other hand, the high contrast and good black reproduction often make the image even more nuanced than with an LCD.
Of course, techniques can always be put in some sort of ranking order; each has its pros and cons. In some situations, the slightly underdog-like dlp technology may still be a better option. The ranking also depends on the settings.
So it's worth comparing, and at least Anyone considering a DLP projector should make sure that this rainbow effect does not interfere with the viewing of themselves and other family members.
Here is a demo video showing how the rainbow effect appears in the photo:
What about LED and laser?
We will also talk about LED and laser projectors. However, this is not about any new revolutionary imaging technology; it is about how the projector’s light is produced. Usually, projectors use conventional gas discharge lamps. In LED projectors, the light source is LEDs, and for the main colors (red, green, and blue), there are separate LEDs. Using partial colors improves the image quality. The power consumption of LEDs is low, they hardly heat up, and they have an extremely long lifespan.
In laser projectors, light is produced by a laser. A laser projector produces a high light output and excellent contrast, but at an expensive price. There are also LED-laser hybrid projectors on the market.
How big a picture?
With a video projector, the image can basically be as large as you want, but it must be in the right proportion for the viewing distance and the characteristics of the projector.. In practice, the recommended size is generally between 100 and 150 inches, although in some cases it can be larger (200–300 inches).
To achieve a cinema-like experience, it is recommended in the industry that the viewing distance is no more than three times the height of the image. Since the size of the image is discussed in this context primarily in terms of its width, we also prefer to use a ratio relative to the width here. With a frame ratio of 16:9, the ratio is 0.59. The recommended width of the image is therefore at least 0.59 times the viewing distance from the image surface, but a wider width is also not a problem. In home conditions, the image can very well be the same width with the viewing distance, and anything that exceeds the television’s image size by quite a bit is kept at home.
The bottom edge of the image is recommended to be positioned at a height of 60–90 centimeters from the floor.
The size of the image produced by a video projector is often referred to as the width of the image in meters or centimeters, whereas with televisions it is referred to as the diagonal, and this refers to the diagonal aspect ratio. If we talk about the diagonal in the case of video projectors, then we usually mean the diagonal of the image area as well.

The size of the image produced by a video projector is often referred to as the width of the image (in meters or centimeters), whereas with televisions the term refers to the diagonal of the image area from corner to corner. If we measure in inches with video projectors, then we usually mean the diagonal of the image area as well.
The image actually grows larger than one might think from the size alone. For example, a 100-inch image is almost 1.8 times larger in area than a 65-inch one, even though the difference in diameter is only 35 inches. The difference is significant. Similarly, a 120-inch image is already 2.6 times larger than a 65-inch one.
The width of the image at 100 inches, with the typical 16:9 aspect ratio, is 221 centimeters and 120 inches with the 16:9 aspect ratio.

The accompanying image gives a good idea of how much larger a 120-inch image is compared to a 48-inch one. The difference is huge! You can even get such a picture for under a thousand euros.
Size and viewing distance
In principle, a 100–120-inch picture is an experience even from normal viewing distances in a room., But to achieve a cinema-like experience, the width of the image should be at least 0.59 times the viewing distance, but it can be much wider than that.
For example, at a viewing distance of 3.5 meters, the width of the image should be a minimum of two meters (3.5 meters x 0.59 = 2.0 meters).
In reverse: The appropriate viewing distance relative to the width of the image is width x 1–1.69. For example, for a 2.7-meter (120-inch) wide (diameter) image, the optimal viewing distance is between 1.6–2.7 meters (2.7 meters x 1 and 2.7 meters x 1.69).
The bottom edge of the picture is recommended to be positioned at a height of 60–90 cm from the floor.

To achieve a cinema-like effect, the recommended width of the image is at least 0.59 x the viewing distance. On the other hand, a 100–120-inch image is an experience that is already impressive from all normal room viewing distances.
Things that affect size and location
Throwing/reflection ratio
The projector is usually informed of the so-called throw ratio (Throw Ratio), which Describes how a large (or small) projector produces an image at a given distance from the image surface. This can sometimes be mentioned in the technical data as the direct throw distance value. The throw distance directly tells you how close or how far the projector can be positioned from the projection surface and what size image this will produce.
If the projector is placed too close to the image surface, the image will be small, and if it is placed too far away from the image it will become too large and its resolution and brightness will also deteriorate.
The distance of the projector from the image surface and its throw ratio determine the size of the image. (The whole here refers to the width of the image). The width of the image is the throw ratio divided by the distance from the projector to the image surface.
For example, the throw ratio of 1.5 means that from a distance of 200 centimeters, only a 133 centimeter wide image can be obtained (200 centimeters : 1.5 = 133 centimeters). For example, to obtain an image 220 centimeters wide (with a diameter of 100 inches), the distance from the projector’s projection surface must be 220 centimeters x 1.5 = 340 centimeters. Even for a larger image (for example, 200 inches, width 442 centimeters), the projector must be located 5.3 meters from the projection surface (442 centimeters x 1.5).
The throw ratio of the projector is important information when you want a certain size image, for example based on the location and size of the screen.
With the Zoom function, the image size can be adjusted infinitely within certain limits. The wider the zoom, the more flexible the adjustment options.
There are so-called short throw projectors on the market that can project an image of up to 100 inches from a distance of just 1–1.5 meters from the projection surface. Ultra-short throw projectors (ultra short throw) can project an image of 100 inches even closer.
For calculating the throw ratio and the image size, there are handy online calculators. See more about this topic at the end of the article. Calculation of throw ratio and image size.
Zoom adjustment
If the projector has image zoom, i.e. the ability to adjust the size of the image (almost all of them have it), the throw ratio mentioned above is usually indicated in the zoom adjustment range, for example 1.2–1.5, in which case the size of the image on a projector at a distance of 340 centimeters in the previous example can be adjusted with zoom between 283–220 centimeters. Or a 220 centimeter wide image can be obtained at a distance of 264–340 centimeters from the projector.

The projection ratio (H) of a projector tells us the size of the image that the projector produces at a given distance from the projection surface. The width of the image (L) is the distance from the projection surface to the projector (E), divided by the projection ratio value (H) (L=E/H). Or, conversely: the distance from the projection surface to the image is the width of the image (L) multiplied by the projection ratio value (H) (E=LxH).
This can be mentioned in the technical data as the direct throw distance value. The throw distance directly indicates the distance at which the projector can be positioned from the image surface and what size image will be obtained in this case.
When moving the projector further away, the image will be enlarged, and when moving it closer, the image will correspondingly be reduced.
The throw ratio of the projector is important information when you want a certain size image, for example based on the location and size of the screen.
With Zoom, the image size can be adjusted within the limits allowed by the zoom factor.

The BenQ W1050 is a more affordable full HD DLP home theater projector with wide zoom. A 8-inch image is achieved from just 2.8 meters away. Thanks to the separate Sport Mode, the projector is promised to reproduce even fast-paced sports with sharp and smooth images without image tearing. Price range under 700 euros.
Offset
The offset value refers to, how many percent of the image's bottom edge is relative to its height above or below the center of the lens. The offset of the image located in the center of the lens level is 50 percent (half of the image is above the lens and half below it). Similarly, a 100 percent offset means that the bottom edge of the image is at the level of the projector lens, in which case 100 percent of the image is therefore above it. For example, a 120 percent offset means that the bottom edge of the 150 centimeter high image is 30 centimeters above the projector lens center point (positioned on top or below the ceiling).

The projector basically reflects the image directly through the lens (in this case, the center of the image is at the center of the lens plane, and its offset is said to be 50 percent, meaning that half of the image is above the lens and half below it). However, projectors are designed so that the image is reflected above the center of the lens. When the projector is placed on a table or a flat surface, the image is reflected obliquely upward, with the lower edge of the image being either at the level of the video projector, in which case the offset value is said to be 100 percent (100 percent of the image is above the center of the lens).
In general, the lower edge of the image still projects somewhat higher than the projector level. In this case, the offset value is over 100 percent, for example 120 percent. Therefore, with an offset value of 120 percent, the lower edge of the image is located 20 percent of the height of the image above the center of the lens. For example, if the height of the image produced by the projector is 125 centimeters, then with the 120 percent offset value in the example, the lower edge of the image is 125 centimeters x 0.2 = 25 centimeters above the projector lens. The recommended height of the lower edge of the image is 60–90 centimeters from the floor.
When installing the projector on the ceiling (secretly), the upper edge of the image remains 25 centimeters lower than the projector, and the lower edge of the image is 150 centimeters lower (25 + 125 centimeters)..
The bottom edge of the image is recommended to be positioned at a height of 60–90 centimeters from the floor, so this should also be taken into account when choosing a projector.
The image can also be projected by tilting the projector, but in this case the geometry of the image suffers: the upper or lower edge of the image is wider than the other. There is usually a correction for this (Keystone), but the image quality suffers from its use.
To ensure the best image quality, the video projector should always be mounted as directly as possible (with minimal adjustments and adjustments) relative to the image surface.
Lens transfer
Lens Shift is a mechanical method of moving the image relative to the lens. The image can be moved seamlessly up or down from the center of the lens without distortion, and in some projectors it can also be moved horizontally. This makes it possible to install the projector clearly off-center from the center of the image.


Some projectors have what is called Lens Shift, which allows the position of the image to be moved in a kind of mechanical and non-rotational manner, in some models even in a side direction. In this case, the projector can clearly be positioned off to the side from the center line of the image.

The Epson EH-TW9300 Full HD projector includes a 4k scaler and support for high dynamic hdr content. Its contrast ratio is reported to be as high as 1,000,000:1. There are also plenty of adjustments for the image, including a 93-percent vertical adjustment for the image position, and the image can also be moved 47 percent in the side direction as well. The zoom ratio with motorized zoom is 2.1. Also available wirelessly (EH-TW9300W). Price range: 3,000 euros.
Keystone
Keystone or trapezoid correction means the electronic correction of the image's aspect ratio. If the video projector is not exactly perpendicular to the image surface and, for example, points slightly upward, the image is wider at the top than at the bottom. With Keystone correction, this distortion can be corrected digitally, but any excess and unnecessary image processing degrades the playback quality.

The image can also be moved by tilting the projector, but in this case the image dimensions will be distorted (see: Keystone adjustment). However, this is not recommended for home theater use because the correction is done electronically and it will not improve the image quality in any way.
For calculating the throw ratio and the image size, there are handy online calculators. See more about this topic at the end of the article. Calculation of throw ratio and image size.
Image quality and resolution
The video projector should naturally produce the best possible image. This is formed from several aspects, including image resolution, brightness, contrast, color reproduction, and motion. We will explain what these mean and what their practical significance is below.
Accuracy
Resolution (resolution) refers to the number of pixels in the image formed from the pixels and the pixels (pixels) of the image-reproducing display panel. The base level for high-quality image is a projector with full hd resolution. This means that the image is formed from 1,920 x 1,080 pixels.
There are also so-called HD Ready projectors on the market, with a resolution of 1,280 x 720 pixels. Their quality is excellent for DVD and television use, but the price difference between full HD projectors has narrowed, so it is often advisable to choose a full HD model directly. There are also resolutions expressed in exotic letter combinations – such as svga, xga, uxga, wxga, wuxga – which mean different resolution levels derived from the computer world. Only wuxga corresponds to full HD resolution. Uxga and wxga can only achieve HD Ready resolution.
In this context, native resolution or resolution is also often referred to, which refers to the actual number of pixels in the original image. The number of pixels in the image can also be increased or decreased mathematically, in which case we are talking about scaling the image. However, this does not correspond to the original image resolution.
Even larger 4k or UHD projectors with 3,840 x 2,160 resolution offer an even sharper image, which is especially noticeable with large image sizes. With 4k resolution, the image is astonishingly sharp. So far, 4k projectors have been quite expensive, but the price has already dropped below 3,000 euros. 4k material is also starting to be available in good quantities, but it’s not yet a mass-produced product.
Also note that the resolution of the image is also affected by the size of the image (the larger the image, the fewer pixels are located from each other). Therefore, it is not advisable to increase the image size too much, even though there is theoretically a possibility to do so. At normal viewing distances in the living room (3–5 meters), the maximum size of the image could be recommended to be no more than 150 inches. With larger sizes, the image resolution suffers (except for 4K images). So it is not always worth striving for an image that is too large.


In the image, examples of the relationship between the image resolution and the image size and resolution.

The Optoma UHD60 is currently the most affordable DLP projector on the market with true 4K resolution. It also supports HDR (High Dynamic Range, extremely wide contrast and color reproduction). The light output is stated at 3,000 ANSI lumens. The projector also has Rec.709 color calibration. Price range: 2,600 euros.

The Optoma UHZ65 is a 4k HDR projector with a reference-level laser light source for demanding home theater use. Price range: 5,200 euros.
Example video showing the effect of image resolution (zoom in to full-screen mode; the differences become more pronounced as the image size increases; achieving the best resolution naturally also requires a 4k display).
Light, colors and contrast
Light output or power
The unit of luminous flux, or more correctly luminous intensity (or luminous flux), is the lumen (old term: lumen) and its abbreviation lm. This refers, in a simplified way, to The intensity of the light emitted by the light source (the projector lamp) at a given distance and area. The higher the value, the more light. Light makes the image brighter. On the other hand, there must be not too much light. The light must not be blinding, and the black must be black and not gray. High light output also usually means a shorter lamp lifespan.
When it comes to projectors, we are talking about lumens. The term “lumen” comes from the standard for measuring the light output of video projectors.
Typically, the light output of the lamps in video projectors is 800–3,000 lumens. For home theater use, a light output of 1,800–2,500 ANSI lumens is generally recommended.
The amount of light required does not solely depend on the lamp’s light intensity, but also on the path the light travels, how large an area it reflects, the type of surface it reflects off, and the lighting in the space itself.
The intensity of the light decreases in proportion to the distance it travels, so the power of the light decreases the farther the projector is from the fabric. The same goes for the wider area the light covers (larger image). This is the case, for example, with a flashlight: the narrower the beam and the closer the object is, the brighter the light.
The lighting in the room itself also affects the amount of light required. The brighter the room, the more light power is needed to compensate for the room's own light.
A more accurate way to assess the amount of light is to compare the brightness of the light reflected from the projector’s screen surface, or luminance. The unit of luminance is candela per square meter (cd/m2). The unit of luminance is sometimes also used in a non-standard unit called nit (1 nit = 1 cd/m²). However, in the case of projectors, the value of the Japanese system, fL (foot-lambert), is often used.
There should not be too much light. A projector that is too bright will glare and even cause headaches.
In a dark or dimly lit room, a maximum brightness of 12–22 foot-lumen, or 41–75 nits, is usually recommended for the light reflected from the fabric. In a more brightly lit viewing space, a brightness of 20–40 foot-lumen, or 70–137 nits, is recommended.
However, there is no standard in this matter. The brightness of the light depends on the input value of the light source, the distance to the surface to be illuminated, the size of the area to be illuminated, and the reflection properties of the illuminated surface.
Comparing the light output of projectors makes it difficult for device manufacturers to use slightly different settings to measure the value.
As a rule, a high-quality video projector produces a sufficiently bright image even in a semi-dark room – in a brightness level where you can, for example, still read a book.
The brightness of the image also has its downsides – namely, black repetition. Too much light makes the black parts of the image appear gray, so it’s always worth adjusting the light output to match the actual need.
Example video:
Color output power
Some manufacturers, in addition to the light output, also report the so-called color light output, which is means the intensity of light in the different primary colors. Normally, the light output is measured with white light.
Especially the manufacturers of LCD projectors say that Due to the operating principle, low-cost and mid-range LCD projectors would have better color brightness than dlp projectors.. On the other hand, DLP projectors often have better contrast and black reproduction, which is related to how brightness is perceived in the image, and DLP also withstands better image magnification.
Contrasts
The contrast is actually a more important factor for home theater use than the light output. Contrasts mean the largest brightness difference between the darkest (black) and lightest (white) part of the image.
The contrast is expressed as a ratio, for example 1,500:1. A high ratio is better.
Projectors and white screens cannot produce black light, so the contrast ratio must not be infinite. Poor contrast is visible with black and dark colors, which appear more gray than black in this case.
There are several ways to measure contrast, and there is no standard for it, so it is often difficult to compare contrast figures directly with the values provided by manufacturers. The contrast value should be measured and reported preferably as so-called gain contrast.

When comparing contrast, it is also important to mention the dynamic range, that is, how many brightness levels the projector can produce. The more levels, the more uniform the grayscale and color reproduction, for example.
Example video of the contrast:
Color reproduction
The repetition of colors should be as natural as possible and the colors should be pure. The colors should not be emphasized. Evaluating the color repetition is easiest based on the skin color.
When it comes to color reproduction, the term color space and various color space models are often encountered, such as srgb or rec.709. A color space indicates how many different color shades a projector can reproduce. Color space models are different.
The video projector’s settings often allow for truly versatile color adjustments. There are various color space models to choose from, as well as various adjustments for things like brightness, contrast, color saturation, color temperature, and more. For more on this topic, see the section on settings.
The number of adjustments should not be feared. Usually, there are also ready-made settings available according to the intended use, which easily achieve the best result.

The colors perceived by the human eye can be evaluated using the CIE 1931 color diagram. It shows the color space seen by the human eye as a graphical representation in the shape of a horseshoe. Image reproduction devices are capable of reproducing only a portion of the entire color space (the triangular regions in the diagram), for which different standards have been defined. (source of image: http://3.bp.blogspot.com)

The Epson EB-U05 is an affordable but versatile full hd projector. Its light output (white and color) is reported to be 3,400 lumens and the contrast ratio is 15,000:1. The light output should be sufficient for use in even brighter conditions. Other features include two HDMI inputs and a promise of up to 10,000 hours of lamp life (in savings mode). Price range 700 euros.
An important screen
In principle, the image from the video projector can be reflected onto any light-reflecting but matte surface—even a white wall. The surface must be completely straight and as flat as possible. If the surface is not straight, it distorts the image. Unevenness in the surface reduces the image’s resolution. The surface must also not be shiny.
The best picture is achieved on a high-quality canvas. Reflections on the wall or tablecloth are not recommended.
The overall size of a white canvas is naturally determined by its placement possibilities. The most popular sizes are 90–120 inches with a 16:9 aspect ratio.
White fabrics are fixed to the wall and can be lowered down from the ceiling (including those that rise from the floor!). Fixed fabrics are usually those where the fabric is sewn between black frames. The black frames make it easy to frame the image and add a sense of contrast to the image. The sewn fabric stays straight and does not flutter, for example due to airflow.
The fabric to be lowered should also have black frames, a completely black upper part of the fabric, and an opaque background. The fabric to be lowered can be manual or motorized. The so-called trigger feature means that the fabric descends and rises back up under the control of the projector.
There are differences in the reflectance of white fabrics. The so-called gain value describes how much the fabric reflects light back. However, a gain value of, for example, 1.2 does not mean that the fabric reflects light 1.2 times more than the reference (the Lambert surface). This should be kept in mind when talking about gain values. The light output of video projectors today is so high that there is usually no problem with the brightness of the image. A too high gain value can cause uneven brightness in the image, depending on which direction it is viewed from. A high gain value may be justified in very bright conditions or when using a low-power projector for a large image.
Attention should also be paid to the contrast and repetition of black. Repeating black from a white surface is indeed challenging. Fortunately, the eye and brain are notoriously easy to deceive, so this one succeeds despite the principle of impossibility.
Despite their name, the white fabrics are also available in gray or even black. What is the idea behind them?
If the viewing area can be darkened almost completely – in which case, for example, reading a book is impossible –, white fabric is the best option. If it is not possible to darken the space or the image to be viewed is to be viewed with lights on or otherwise in conditions other than near darkness, gray fabric may be a better choice than white. With white fabric, the darkness of the space blurs the black tones to gray, and the contrast of the image deteriorates, making it unwatchable.
You can improve the black reproduction and contrast of the image by choosing a screen with a gain value of less than 1. Such screens are typically silver-gray in color, with varying degrees of grayness. There are also nearly black screens on the market that are promised to provide a bright and wide-contrast image in a fully-lit room and in daylight. The screens can also be perforated, allowing the installation of home theater system speakers behind them if necessary.
The price range for white fabrics is wide. For example, a 100-inch fabric can be purchased for as little as 100 euros, but it can also cost up to over 2,000 euros.

Grandview is one of the world's largest manufacturers of white fabric, and its range is also very extensive. The range includes, for example, manual, electric, edge-creasing tab-tensioned, fixed, lift-up mobile-use, structural-mounted, and giant public-space specialty white fabrics.

The manual roll screen is the most affordable way to get into the home theater hobby. The Grandview Cyber screen has a white frame, meaning it disappears from view when mounted on the ceiling. The Grandview Cyber screen comes standard with Speed Control, which means that even if you unroll the screen, it smoothly retracts back into its frame. In the photo, the Grandview Cyber 106" 16:9 manual roll screen. Price range 390–370 euros.

The Grandview Fixed 4K screen, designed for home theater use, is permanently installed and is available, as needed, in either the premium matte white fabric material, the high-contrast and bright-colored uhd version, or the pure sound-permeable acoustic fabric. The available frame sizes in Finland vary from 180 inches to 240 inches, depending on the importer. Prices start at 490 euros.
Installation
Installing a projector and a screen is not difficult, but it still requires time, expertise, and knowledge. This is one of the reasons why projectors have not become as widespread as could be expected based on their benefits.
In its simplest form, a video projector can simply be placed on a table, plug in the power and video signal cables (although in some models the image can also be wirelessly projected to the projector), point the projector at a white wall (perhaps preferably on a stage or a white cloth), adjust the image – and voila: the movie night can begin.
Of course, the first time you use a video projector requires some configuration, but after that it’s easy to use. However, often the projector and screen should be installed firmly and with consideration for their characteristics – and before purchasing them, the investment and installation options should already be clear.
Investment in white fabric
The best placement for white fabric is basically on a wall that reflects as little direct light as possible. In this regard, you will probably have to make compromises, but you should probably not place the fabric directly next to the window or against the opposite wall – at least not if the image is intended to be viewed other than through the window when it is completely darkened. If there is a lot of ambient light in the room, there are fabrics on the market that reduce the reflection of ambient light.
Next, it is assessed what the height of the bottom edge of the screen will be from the floor. The recommendation is 60–100 centimeters. This should be taken into account already at an early stage when mapping the location of the projector and the screen, and especially in relation to the placement of the projector and the offset value of the projector. The offset value determines the height at which the bottom edge of the image is positioned relative to the height and distance of the image surface from the projector. Especially in the ceiling installation, the image can easily get too high.
The image can indeed be moved by tilting the projector, and the distortion caused by it can be corrected if necessary with the keystone adjustment found on almost all projectors, but this is not recommended, not even for very minor corrections.
Before the final installation of the screen, it should be ensured where the projector image will be placed. For example, the center point of the screen and the lower edge can be marked with masking tape at this stage, and then proceed to the actual installation of the projector.
Projector in place
The distance of the projector from the screen is therefore determined by the size of the image and the throw ratio of the projector (throw distance).
Typically, the projector is placed somewhere in or behind the viewing area on the ceiling. There are various types of ceiling mounts available for this. The projector is attached to them upside down, and the image is also displayed upside down. Most projectors have the option to turn the image back to the correct orientation. Projectors can also be placed on the back wall using wall mounts if the back wall is not too far from the projection surface and the projector’s throw ratio and zoom allow for this.
The projector can also be placed directly on the table or surface above the viewing area or in front of it.
The cooling fans of projectors can produce some noise, which can be disturbing if the projector is located near the viewing area. It is a good idea to check this before purchasing the projector.
Wiring
Projectors often have many different connections. However, in home use, you rarely need to connect anything other than the power cord and cable for the video signal. This is often the biggest challenge in installing a projector. Few people have electricity already installed in the ceiling. The easiest way to do this is with long wires or cables hidden inside a junction box or conduit – at least for ceiling and wall installation. Wiring a projector that is placed in the center of the room or on a level surface or desk can be a more challenging task.
Almost without exception, the video signal is delivered to the projector in digital form via an HDMI cable. Since the cable runs long (over five meters), the quality of the cable is of great importance. And here we are not talking about the black-out theory of cables. If the length of the HDMI cable exceeds 10–15 meters, you will most likely have to use a so-called HDMI repeater (-repeater/-extender), which strengthens the signal and allows for cable lengths of up to 45 meters.
The image can also be transmitted wirelessly to a projector. Some projectors (at least those from Epson and Optoma) have a built-in wireless receiver and a separate transmitter unit for the program source. There are also separate wireless links available that are connected to the input and output terminals and the signal is transmitted wirelessly between them. There are differences in their functionality, so we recommend sticking with the well-known brands.
Photo preview:
Picture on the wall
Next, the power is connected to the projector, and after the start image, we can start configuring the settings regarding the projector’s location, aspect ratio, image size, position, and geometry.
The aspect ratio is therefore selected to be 16:9, and the image size is adjusted to the desired size.
It is advisable to set the potential zoom adjustment at the center point at this stage, so there will still be room for adjustment later at the desired height and image format.
Actually, there’s still no need to attach the canvas itself until the exact location and size of the image are set correctly.
The projector should therefore be chosen and positioned so that it does not need to be tilted up or down, and especially not turned sideways. The image should be projected onto the viewing surface as directly as possible.
However, this is not always possible. For example, the image may end up being too low or high.
For example, if the front edge of the projector has to be tilted upwards, which is a very common setup when installing the projector on a table or on a stand, the image at the top of the projection will be stretched. On a ceiling installation, however, if the projector has to be tilted downwards, the image at the bottom will be stretched. When tilted sideways, the image will either stretch to the right or to the left.
Projectors that have lens shift function (lens shift) enable the image to be projected in both the vertical and horizontal directions without having to tilt or rotate the projector.
If there is no lens shift, the image geometry error has to be corrected using electronic keystone adjustment (i.e., a trapiche correction). With keystone adjustment, the image edges are straightened. Keystone correction (especially at high levels) may degrade the image accuracy.
Next, the possible image size is set using the desired projector zoom function.
Now that the picture is in place, mark its position with masking tape on the wall and you can move on to installing the canvas itself.
White cloth in place
Next, the screen is attached according to the instructions.
The fabric in a fixed frame can also be installed by yourself, if only a drill and a screwdriver are kept in hand. It’s a bit like assembling a large painting.
Of course, if you feel even the slightest uncertainty when drilling into concrete or with fixing props, then the work should be done by a professional.
This applies especially to the ceiling-mounted, pull-down curtains. It would be advisable for them to stay in place.
The white canvas should be installed absolutely straight, even though the black frames do allow for some adjustment here, and also absolutely centered in the image area. This avoids unnecessary additional adjustments.
Photo adjustment
When the image appears on the screen, First, sharpen it with the sharp projector adjustment (Usually mechanical adjustment near the optics). After that, you can delve into the menus of the projector and fine-tune the image. It’s a bit like with TVs: there’s so much to adjust and choose from that it can even scare some people away from buying a projector. But don’t worry. Nothing can go wrong, and there’s always help to be found.
The numerous and versatile settings also have a great benefit. They allow you to optimize the image in the best possible way, according to the viewing space, the intended use, and your own preferences.
For those who are not interested in numerous settings, projectors usually also have ready-made presets for various uses, as well as pre-selected settings based on, for example, the brightness of the viewing area and even the color of the walls. It is worth experimenting with the settings and choosing the best ones for yourself.
Video projectors usually also have brightness, contrast, color, color saturation, and, for example, resolution controls familiar from television.

Video projectors nowadays typically have a huge variety of settings, choices, and adjustments. The numerous and versatile settings also provide great benefits. They allow the image to be optimized in the best possible way, according to the viewing space, the intended use, and the user’s own preferences.

For precise adjustment, you can use test DVDs and Blu-ray discs designed for this purpose. Recommended examples include Disney WOW: World of Wonder, Digital Video Essentials: HD Basics, and Spears & Munsil High-Definition Benchmark. There is also good test footage available on YouTube to help with adjustment, such as the ones below:
From where the picture?
Most commonly, movies are watched on projectors from DVD or Blu-ray players. They are usually connected to a separate AV receiver via HDMI cable. In this case, the image is projected to the projector from the HDMI output of the AV receiver. The player can also be connected directly to the projector.
In principle, the image from a computer, phone, or tablet device can also be displayed easily through a projector – even wirelessly if the projector is equipped for this (wlan or wifi). There are various technologies and applications for wireless image transmission, such as Miracast, WiDi, AppleTV, Samsung AllShare, and Google Chrome Cast.
The projector can be connected directly to any external media player, such as a Google Chromecast adapter, making it easy to play all online content through the projector, such as from Netflix, YouTube, Katsomo, Yle Areena, and your own videos and photos from the phone or cloud services.
What about television programs?
Video projectors do not have television tuners, so to watch TV broadcasts you need an external device, for example, a digital media player or a digital media player that records immediately. For example, a separate TV tuner add-on is available for the Xbox game console as well.
In this context, it is worth mentioning that most TV broadcasts are still in low resolution (720 × 576), so the high-definition quality may not be the best in them. Sharply defined programs can be watched on channels YLE HD, MTV HD and Nelonen HD. Also, pay-TV operators offer movies in HD broadcast quality. On a general level, TV broadcasts should switch to full HD-quality by 2020.

It is easy to stream TV broadcasts to a video projector from an external source, even with a recording digital box.
In the photo is the HDThunder HD6500 V2, featuring a single terabyte hard drive and dual drives (recommended retail price €389).
The sound is also in order
Sound is an important part of movies and games. Especially with a large image. It is assumed that with a video projector, the audio department will also handle the large image. This means at least an AV amplifier with 5.1-channel surround sound, main speakers, a center speaker, rear surround speakers, and possibly even a separate subwoofer. Through a dedicated AV amplifier, the music and the video signal can easily be transmitted from multiple devices. High-quality AV amplifiers are available for every need, from 300 euros upwards. And there is even more choice when it comes to speakers.

With a large picture, the importance of sound also becomes more pronounced. The sound system is a good place to build around a high-quality AV amplifier, and the most important link in terms of sound quality is the speakers.
In picture 7.1-channel Dolby Atmos surround processing and automatic room correction equipped Denon AVR-X4200W AV receiver, and the Dali Opticon 5.1 selected as the best home theater audio series of 2016-2017 in Europe.

The Focal Sib Evo 5.1.2 speaker series’ main speakers feature integrated dedicated channels for Dolby Atmos surround sound. The compact speakers are easy to position, and the convenient stand doubles as a wall mount. Identical to the main channels, a separate subwoofer delivers a good stereo picture and clear movie dialogue. A dedicated active subwoofer reproduces low-frequency effects with power. The series was recently named the best home theater speaker system in Europe for 2017–2018 (recommended price €1,190).

The German Hecon Ambient 5.1a speaker system is one of the best ready-made systems we have heard in its price range (recommended retail price €749)

The KEF T205 is a 5.1 speaker system with extremely slim speakers. The speakers are only 35 millimeters thick. The depth of the separate active subwoofer is also only 177 millimeters. The speakers come with both a tabletop and wall mount bracket. The recommended retail price for the series is 1,649 euros.
The Dolby Atmos surround system uses so-called height channel speakers that are placed above the listener. Many people struggle with installing them, and there are even options where the height channels are reflected from below the ceiling by separate speakers, for example those connected to the main speakers.
In the photo, the Definitive Technology BP9020 floor speaker features built-in active subwoofers (recommended retail price per pair: 1,500 euros). The models in the range are available with separate height channel enhancement speakers that can be directly integrated into the speakers (Definitive A90, recommended retail price per pair: 580 euros).
>>IMAGE: Video kits_product placement_KEF_T101
Due to their low design, KEF's T-Series T101 speakers are excellently suited for use in a Dolby Atmos surround system as height channel speakers placed above the listener (recommended price per pair: 389 euros).
Expert tips

Mika Hottinen has sold, installed and calibrated hundreds of video projectors for Mareksound.
We asked him for advice, opinions, and tips on choosing a projector.
Q: What are the prerequisites for choosing a cannon? What should be paid attention to?
V: As a starting point, you should consider what use you will give the projector. If the purpose is to occasionally watch home videos, you can easily do so with a less expensive projector. If movies or sports are a shared passion of yours or your family, you should choose a more capable device in its price range. You should also pay attention to the quality of the projector’s performance.
Q: Set these in order of importance: contrast, resolution, and brightness?
V: I don't think it can be set.
Q: Why is this happening?
V: The image from the projector is a combination of many things. I don’t put much importance to the things mentioned above because they are all part of a good image. The room’s brightness, the screen, and the material being watched determine the correct order of importance. I find the resolution to be the least important in my own way when it comes to the differences between Full HD and 4K material. 4K material is certainly stunning in all its color richness, but a high-quality Full HD Blu-ray can, in terms of resolution, be at least adequate.
Q: What white couch and TV stand do you recommend for a regular 4 x 5 m living room that doesn’t have to be completely dark? The main use is watching TV and bluray movies, and sometimes sports. Sometimes also playing games (mainly racing games).
V: For example, the Epson EH-TW9300 is, in my opinion, one of the most versatile projectors on the market. A steady and high-quality image with a very high light output ensures a versatile user experience. Works beautifully in the cinema and, thanks to its small response time, also in sports and games. For a white screen, I recommend the Grandview frame fabric 120-inch or the motor fabric.
Q: What do you think is the optimal image size?
V: It seems like a simple question, but it’s actually a lot of things combined. With 4K resolution, the size of the image has grown upwards, and that pleases movie enthusiasts. However, we must remember to keep a balance in everything. Projectors have their own limitations, and when we talk about a normal living room, where, for example, the Epson EH-TW9300 mentioned earlier is installed, the optimal image size is somewhere between 110 and 140 inches. Generally, the higher-quality projector, the room and the fabric, the bigger image can be produced without losing image quality.
Q: How much light output should the projector have for watching movies in a dark/dim room where the screen is 3.8 meters from the screen and the image size is 150 inches?
V: The image size in question with ”consumer” projectors is not quite 3.8 meters. With a 2.10 x zoom projector, the image would be about 4.5 meters from the screen. The light output from that amount of light on a normal white screen should be +1500 lumens. There are light-boosting fabrics on the market that can further increase the size and brightness of the image.
Q: For whom is LCD, for whom is DLP? Which is better?
V: LCD is easy to install and very high quality, especially in the slightly higher price range of about 2000 euros and above. With a DLP projector, you get a quality image in lower price ranges of about 1000-1500 euros.
Q: Your best affordable projector?
V: Sony VPL-HW45ES
K: Your best-selling model?
V: JVC DLA-X5500/ JCV DLA-X5900
Q: What kind of projector do you have?
V: JVC DLA-X5500
Q: Can you give me a few tips on installing and adjusting the tank?
V: The easiest way to achieve this is to install the projector in the center of the screen. Be sure to measure the screen so that the throw distance you want will definitely give you a large enough image. A 150-inch screen is not ideal if the actual image size is 120 inches. Avoid using keystone and dynamic image modes.
We also asked the same questions to four other specialty stores in the industry.
See their answer on the online course
Calculation of throwing distance
If throw distances, aspect ratios, viewing distances, and brightness interests you more, we recommend you check out the English-language website www.projectorcentral.com Projection Calculator Pro online calculator, that displays the image sizes enabled by different projectors from different throw distances, an estimate of the appropriate viewing distance, the brightness of the image, a recommendation for the lighting level of the viewing area, and much more. The calculator isn't exactly the most straightforward to use, but we recommend you take a look if you're even remotely interested in the topic. The site also contains a lot of other information about the subject.

Projection Calculator Pro online calculator calculates and displays the image sizes possible with projectors from different throw distances and zoom settings, the position of the image relative to the projector's height, an estimate of the appropriate viewing distance, the brightness of the image, a recommendation for the lighting level of the viewing area, and much more.
The program is a bit complex to use and does not necessarily include all the latest models on the market, but it provides a lot of information. The program can be found at www.projectorcentral.com/projection-calculator-pro.cfm
Projection manufacturer’s own throw distance and image size calculators:
www.epson.fi/lens-distance-calculator
www.optoma.co.uk/distancecalculator/
projectorcalculator.benq.com/
In collaboration with:


Brand/representatives of the case:
BenQ: www.benq.fi
Denon: www.denon.fi
Epson: www.epson.fi
Focal: www.kruunuradio.fi
Grandview: www.highendstudio.fi
HDthunder: www.hdthunder.fi
KEF: www.highendstudio.fi
Heco: www.hifitalo.fi
Optoma: www.highendstudio.fi
Supra cables: www.hifi.fi
One For All: www.avkomponentti.fi
Most read today

Latest
Subscribe to the newsletter
Subscribe to our newsletter and stay up to date with the latest news in technology and entertainment electronics.
Survey
Quiz
Nokia phones
Related Posts
IN THE TEST: TCL 65C7L – Bright Mini LED with Wide Color Reproduction
TCL has invested heavily in Mini LED TVs in recent years and has also brought high brightness, rich local contrast, and comprehensive gaming features to clearly...
TCL Z100 and Z100-SW FlexConnect speakers – Easily almost like a real home theater
Dolby Atmos FlexConnect promises to solve one of the eternal problems of multichannel sound: the speakers don't need to be exactly in the right positions. The TCL Z100 speakers can...
IFA 2026 – these were the most interesting AV and technology innovations from Berlin
The Berlin IFA 2026 was not built around a single major announcement. TVs with RGB backlighting are making a strong entrance, soundbars are growing into full multi-channel systems, and projectors...
Sonos updates its audio system with three new models – Beam Ultra, Ace Ultra and Sonos 27 expand the lineup
Sonos has unveiled two new audio devices and a next-generation software platform in one go. The new products announced in early September include the compact Beam Ultra soundbar,...
Age rating labels for audiovisual content in Finland: The role of KAVIn and the PEGI labels for games
Where do age limits come from for home theater? When you choose a movie, series, or game for the TV in the living room, an age limit and content symbols often appear. They tell...
Monitor Audio revamped the Silver series after a five-year hiatus – seven 8G models for stereo and home theater
The long-lasting Silver speaker system from Monitor Audio has moved into the eighth generation. The new Silver Series 8G consists of seven models that can be used to build a traditional...
 Suomi
Suomi  English